If you missed your fall garlic-planting window, don’t worry—spring still gives you a solid second chance.
Sure, fall garlic tends to grow bigger bulbs because it gets a longer head start. But with the right spring techniques, timing, and a little extra care, you can still harvest beautiful, flavorful garlic by midsummer.
The trick? Plant early, chill your cloves beforehand, choose the right varieties, and pay attention to watering and fertilizer.
Spring garlic is basically fast-tracked garlic—so you have to help it along. Let’s break it all down in a simple, friendly, and garden-blog style.
Spring vs. Fall Garlic: What’s the Big Difference?

Fall-planted garlic settles in during autumn, sleeps through winter, and jumps into growth as soon as spring warms up. That long cycle makes bulbs big, flavorful, and great for storage.
Spring garlic, on the other hand, has only a few months to do the same job—root, shoot, grow, and bulb out. Because of the shorter season, bulbs are usually smaller and some cloves may turn into “rounds” (a single, undivided bulb).
But spring planting does come with perks. You don’t have to worry about winter damage, rot, or timing the fall planting perfectly. And for gardeners in mild climates (or those who simply forgot to plant in fall), spring planting is a lifesaver.
Also Read: 13 Vegetables to Grow All Year Round
Preparing Garlic for Spring Planting
Cold Treatment: The Most Important Step
Since your garlic won’t be naturally chilled in the soil like it would in winter, you need to mimic that cold period.
Just pop your bulbs into the refrigerator for 4–6 weeks before planting.
Keep them around 35–40°F and away from ethylene-producing fruits like apples.
Hardneck varieties especially need this cold treatment, or they may never form proper bulbs.
Choose Good Seed Garlic
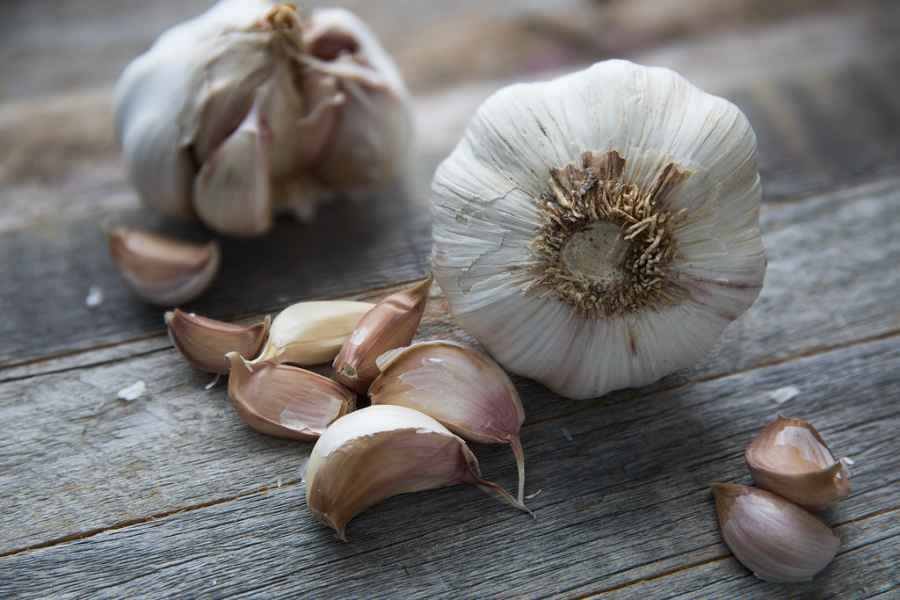
Skip grocery-store garlic—it may be sprayed with sprout inhibitors and often carries disease.
Instead, buy certified disease-free seed garlic from a nursery or online supplier. Choose big, plump cloves. The larger the clove, the bigger the bulb you’ll get.
Break bulbs into cloves right before planting and keep the papery skins intact.
Best Garlic Varieties for Spring
Softneck Garlic (Best for Spring)
Softnecks mature faster, handle warmer weather well, and don’t need as much cold exposure.
Great spring varieties include:
- California Early – Fast growing, mild flavor, stores ~6 months.
- Early Italian – Reliable, heat tolerant, large bulbs, stores up to 12 months.
- Silver Rose – Pink-tinted cloves, excellent in hot climates, long storage.
- Inchelium Red – Award-winning flavor, large bulbs, great for roasting.
- Nootka Rose – Clove-heavy bulbs, beautiful skins, strong flavor.
Hardneck Garlic
Hardnecks can be planted in spring, but only with proper cold treatment.
A great option:
- Chesnok Red – Sweet, rich flavor, purple-striped bulbs, cooks beautifully.
Hardnecks also give you garlic scapes, those delicious curly flower stalks that show up in early summer. They’re edible and removing them helps bulbs grow bigger—so it’s a win-win.
When to Plant Garlic in Spring?
Plant garlic in spring as soon as soil is workable—March in warm climates, early May latest in cold regions.Cold-treat cloves 4-6 weeks in fridge first for proper bulb formation.
Early planting maximizes growth time before summer heat; delayed planting yields smaller bulbs.Use raised beds for faster soil warming and softneck varieties for quickest maturity.
Space cloves 6 inches apart, 2-3 inches deep in full sun with good drainage.Northern areas: early April-May; southern zones: late Feb-March for best results.
Understanding Your Climate
- Cold climates: Spring garlic works fine but needs perfect timing.
- Mild climates: Flexible timing, although fall still gives the biggest bulbs.
- Hot climates: The biggest challenge—bulbs will form too fast if planted late.
Aim to plant when soil temps hover near 40°F so the plant has time to grow leaves before heat triggers bulbing.
How to Plant Garlic in Spring?

Planting garlic in spring is a great option for gardeners who missed the fall window or live in areas with mild winters. Sure, fall garlic usually produces bigger bulbs, but with the right timing and care, spring-planted garlic can still reward you with healthy, flavorful harvests by summer.
The key is simple: plant early, prep your cloves properly, and give your garlic a little extra nutrition and attention compared to fall planting. Below is a complete step-by-step guide, expanded in detail and written in a friendly, blog-style format.
1. Select the Right Garlic for Spring Planting
Start with seed garlic, not grocery store bulbs. Grocery garlic is often sprayed with sprout inhibitors and can carry diseases that ruin your crop.
Choose bulbs that are:
- Large and firm
- Free from mold or mushy spots
- Full of plump outer cloves
Bigger cloves generally grow into bigger bulbs, so avoid using tiny inner cloves unless you’re fine with smaller heads.
Break your bulb into individual cloves only when you’re ready to plant, keeping the paper skins on to protect them from rot and pests.
Also Read: 19 Cold-Hardy Vegetables You Can Grow This Winter
2. Chill the Cloves to Mimic Winter (Very Important)
Unlike fall garlic, spring-planted garlic needs artificial cold exposure to trigger proper bulb development.
Place your cloves in the refrigerator for 4–6 weeks.
Ideal temperature: 35–40°F.
Keep them:
- Dry
- In a breathable mesh or paper bag
- Away from apples and bananas (they release ethylene gas which can prevent sprouting)
This chilling period “wakes up” the cloves and helps them form nice divided bulbs instead of small single rounds.
3. Plant as Early as the Ground Can Be Worked
Timing is everything in spring garlic.
Garlic starts growing in soil temperatures as cold as 40°F (4°C), so you don’t have to wait for warm weather.
Best planting windows:
- Cold climates (Canada, northern US): March–early May
- Moderate climates: February–April
- Warm/southern climates: January–March
The earlier your garlic gets into the soil, the more leaf growth it can produce—leaf growth directly influences bulb size. If planted too late, bulbs form too quickly in summer heat and end up small.
4. Choose the Right Spot for Your Garlic Bed
Garlic grows fastest with full sunlight, at least 6–8 hours a day.
The more sun it gets, the better it performs in spring’s shorter growing season.
Raised beds work beautifully because:
- They warm up quickly
- They drain better
- They prevent waterlogging, which garlic hates
- They reduce disease risk
Avoid planting in shady, soggy, or low-lying spots where cold air settles. Garlic thrives in warm, airy, well-drained areas.
5. Prepare Loose, Fertile Soil
Garlic roots are shallow yet strong, and they love loose soil that allows bulbs to expand freely.
Before planting:
- Loosen soil 6–12 inches deep
- Remove rocks, weeds, and debris
- Mix in 2–3 inches of compost
- Aim for soil that feels crumbly rather than sticky
Garlic prefers soil with a pH between 6.0 and 7.0. If your soil is heavy clay, mix in sand, compost, or leaf mold to improve drainage.
Also Read: 19 Vegetables to Plant in October
6. Plant the Cloves with Proper Depth and Spacing
Spacing and depth directly affect bulb size.
Plant like this:
- Depth: 2–3 inches
- Spacing: 6 inches apart in every direction
- Orientation: Pointy end up, flat root end down
Planting too shallow increases the risk of frost heave or drying out.
Planting too deep delays emergence. Stick to the middle for the best results.
Cover the cloves gently with soil—don’t pack it tightly. Loose soil helps roots spread quickly.
7. Water Deeply After Planting
Right after planting, give the bed a thorough watering. This helps the cloves settle in and begins the root-growth process.
In early spring, rain often provides enough moisture, but check the soil regularly. Garlic likes soil that’s moist but not waterlogged, especially during the first few weeks of growth.
If the soil dries out early on, cloves may sprout poorly or unevenly.
8. Add a Light Layer of Mulch
Unlike fall planting, spring garlic benefits from light mulch, not heavy winter insulation.
A thin layer of:
- Straw
- Shredded leaves
- Pine needles
will help:
- Retain moisture
- Reduce weed growth
- Keep soil temperature stable
Avoid thick mulch because it slows soil warming, which spring garlic needs.
9. Feed Garlic Well Throughout Spring
Spring-planted garlic has a shorter season, so it needs extra nitrogen to grow leaves quickly. Garlic makes bigger bulbs when it has more leaves early on.
Good organic fertilizers include:
- Blood meal
- Fish emulsion
- Compost
- Feather meal
- A balanced organic vegetable fertilizer
Feeding schedule:
- First feeding when shoots appear
- Next feeding 3 weeks later
- Continue feeding every 3 weeks until June
Once garlic starts forming bulbs, it uses up nutrients fast. Consistent feeding equals better harvests.
10. Weed Regularly to Avoid Competition
Garlic doesn’t like competition.
Its shallow roots mean weeds can steal water and nutrients quickly.
Check your garlic bed every week and gently pull weeds by hand.
Mulch helps suppress some weeds, but you’ll still need to monitor the area.
Keeping the bed weed-free helps garlic develop strong, healthy bulbs.
11. Water Consistently as Garlic Grows
Garlic needs consistent moisture to grow leaves and form big bulbs.
General guidelines:
- Water deeply every 7–10 days
- Increase watering during hot or dry spells
- Ensure soil stays evenly moist, not soggy
- Stop watering 1–2 weeks before harvest
In containers, garlic dries out twice as fast, so water more frequently.
As harvest approaches, reducing water helps the bulbs firm up and improves curing.
Also Read: How to Grow Tomatoes Indoors in Winter?
12. Remove Scapes from Hardneck Garlic
If you planted hardneck varieties, you’ll see scapes (curly flower stalks) appear in early summer.
Snapping these off helps the plant direct energy into bulb growth rather than seed production.
Harvest scapes when:
- They make one full curl
- They rise above the leaves
- They feel firm and green
Scapes are edible and delicious—use them in pesto, stir-fries, or garlic butter.
13. Watch for Signs of Pests and Diseases
Garlic is generally low-maintenance, but a few issues can occur.
Common pests:
- Thrips
- Garlic maggots
- Aphids (rare but possible)
Early detection helps prevent damage.
Common diseases:
- Downy mildew
- Fusarium rot
- White rot
- Purple blotch
Good airflow, well-drained soil, and proper spacing greatly reduce disease risk.
14. Harvest at the Right Time
Spring-planted garlic usually matures in mid to late summer.
The best harvest indicator:
- Bottom 2–3 leaves turn brown
- Upper leaves stay partly green
Don’t wait until all the leaves are dead—that means the bulb wrappers are breaking down, which affects storage quality.
Use a fork to gently loosen the soil and lift each bulb by hand.
15. Cure the Garlic for Long-Term Storage
Curing is critical for flavor and storage life.
Hang or lay garlic in a dry, shaded, well-ventilated area for 2–4 weeks.
The skins will turn papery and the necks will dry completely.
Once cured:
- Trim the roots
- Clip the stem (unless braiding softnecks)
- Brush off loose dirt, but don’t wash the bulbs
16. Store the Garlic Properly
Store cured bulbs in:
- A cool room
- Dry air
- Good airflow
- A dark place
Avoid the fridge—moisture causes rot.
Softnecks store for 6–12 months, while hardnecks usually store for 3–5 months.
Check your stored bulbs every few weeks and use any that begin sprouting first.
Pests & Diseases
Garlic is fairly low-maintenance, but pests like thrips or garlic maggots can occasionally show up. Keeping good airflow around the plants and checking leaves regularly helps you catch issues early before they spread.
Diseases such as downy mildew, fusarium rot, or purple blotch can develop in damp, poorly drained soil. Choosing sunny locations, spacing plants properly, and avoiding overhead watering greatly reduces the risk.
If you notice discolored leaves, soft bulbs, or stunted growth, remove affected plants quickly to protect the rest of your bed. Clean gardening practices and proper crop rotation go a long way in keeping garlic healthy all season.
Harvesting Spring Garlic
Spring-planted garlic is usually ready to harvest in mid to late summer, and the biggest clue is the foliage. When the bottom two or three leaves turn brown while the upper leaves stay partly green, it’s a sign that the bulbs have fully formed.
Stop watering about one to two weeks before harvest to allow the bulbs to dry slightly in the soil. This helps the outer wrappers tighten and improves both curing and storage quality.
Use a garden fork to gently loosen the soil around each plant and lift the bulbs carefully by hand. Avoid pulling the stems directly, as this can damage the neck and reduce how long your garlic will keep.
Curing & Storing Your Garlic
After harvesting, cure your garlic by hanging the bulbs or spreading them out on screens in a dry, shaded, and well-ventilated space. Leave them to cure for about two to four weeks until the outer skins feel papery, the necks are fully dry, and the roots are crisp. This slow-drying process is what helps your garlic store well and develop stronger flavor.
Once cured, you can trim the roots and stems or braid the softneck varieties if you prefer. Spring-planted garlic generally has a shorter shelf life than fall garlic, usually lasting about three to six months, though softneck types can sometimes stretch close to a year. Store the bulbs in a cool, dry spot with good airflow and low humidity, and check them regularly so you can use any bulbs that begin to soften or sprout first.
Spring Garlic Success Tips
Spring garlic thrives when you give it the best possible growing conditions. Choose a sunny location with at least six to eight hours of direct light each day and plant in loose, rich, well-drained soil that allows the bulbs to expand easily.
Since spring garlic grows on a tighter timeline, fertilizing with extra nitrogen and keeping the soil consistently moist gives the plants the boost they need to grow quickly.
Plant as early as you can in spring so the garlic has enough time to produce strong leaf growth before warm weather triggers bulb formation.
With early planting, good soil, steady watering, and proper feeding, your spring garlic will develop into healthy, flavorful bulbs by midsummer.